Capturing API Calls from Azure APIM
Requirements
- An Azure subscription
- An Azure API Management service instance
Automatic deployment
To run Resurface on Azure, click the button below. This option automatically configures the necessary resources and deploys them together with Resurface Containers to Azure.
Alternatively, you can deploy the automatic configuration only, without the Resurface Container Group, by clicking here. Select this option if you plan on running Resurface containers elsewhere.
Manual setup
In order to start capturing API calls from your Azure API Management instance, some previous configuration is needed. Specifically, we need to create and deploy four resources: an Event Hub, an APIM Logger and Policy, and a Storage account.
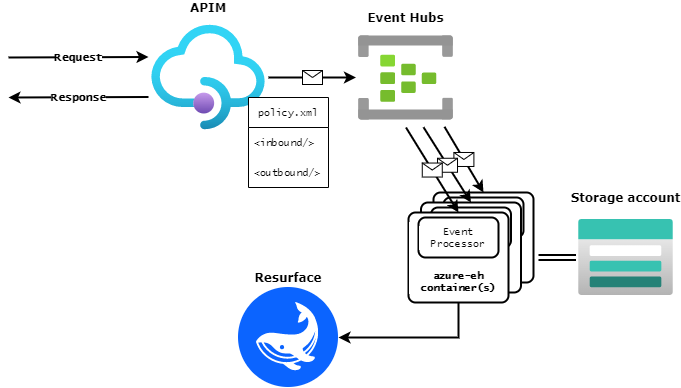
Creating an EventHubs instance
Follow this guide from the official Microsoft documentation. Please, take note of both the Event Hubs Namespace name and the name of the Event Hubs instance.

For this guide we’ll use an Event Hub called testeventhubname that lives in an Event Hubs Namespace called testnamespacename.
Getting the Connection String
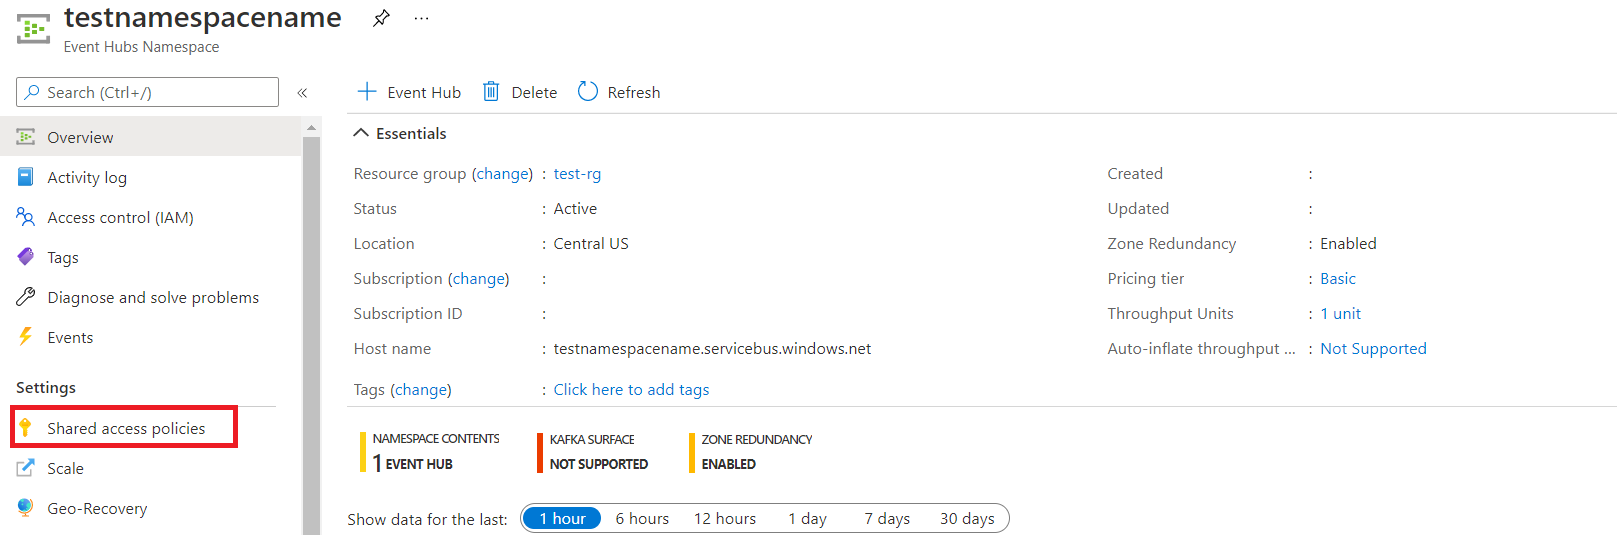
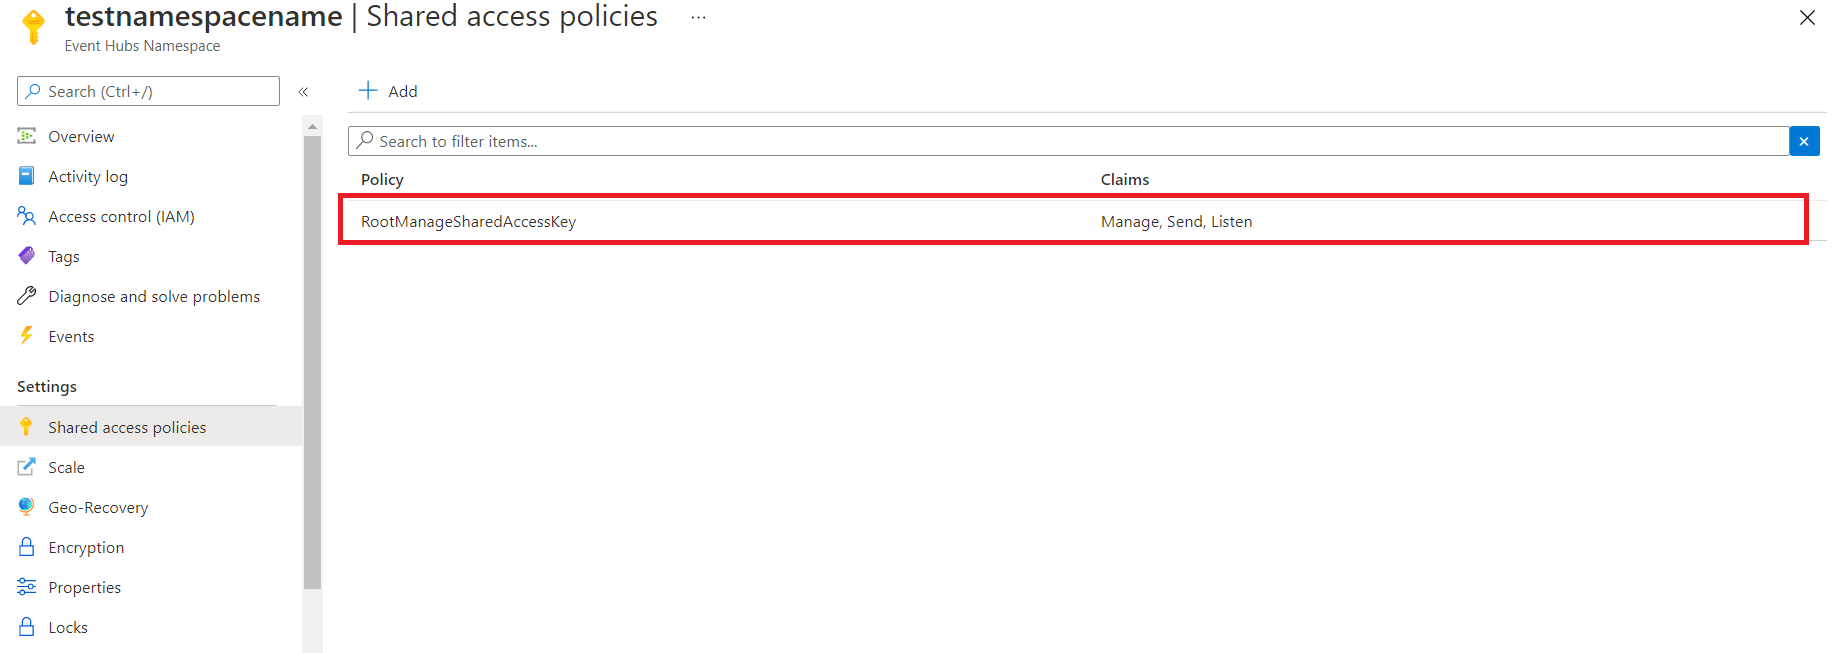
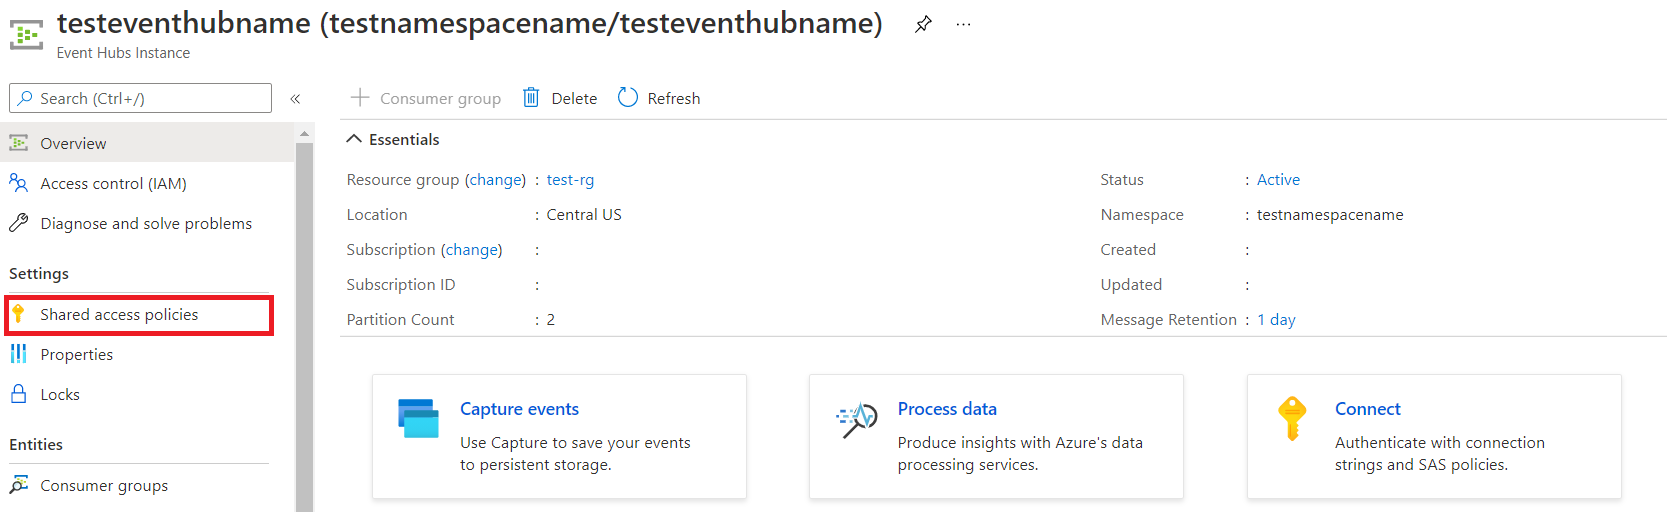
Before we create our APIM Logger, we need to get hold of our Event Hub’s connection string. We can either use a namespace Shared Access Signature (SAS) policy or we can create an access policy for our Event Hubs instance. For this guide we will use our namespace’s default SAS policy RootManageShareAccessKey, but you can create and use your own custom policy.
Go to the Event Hubs namespace that you created earlier and click on Shared access policies under Settings:
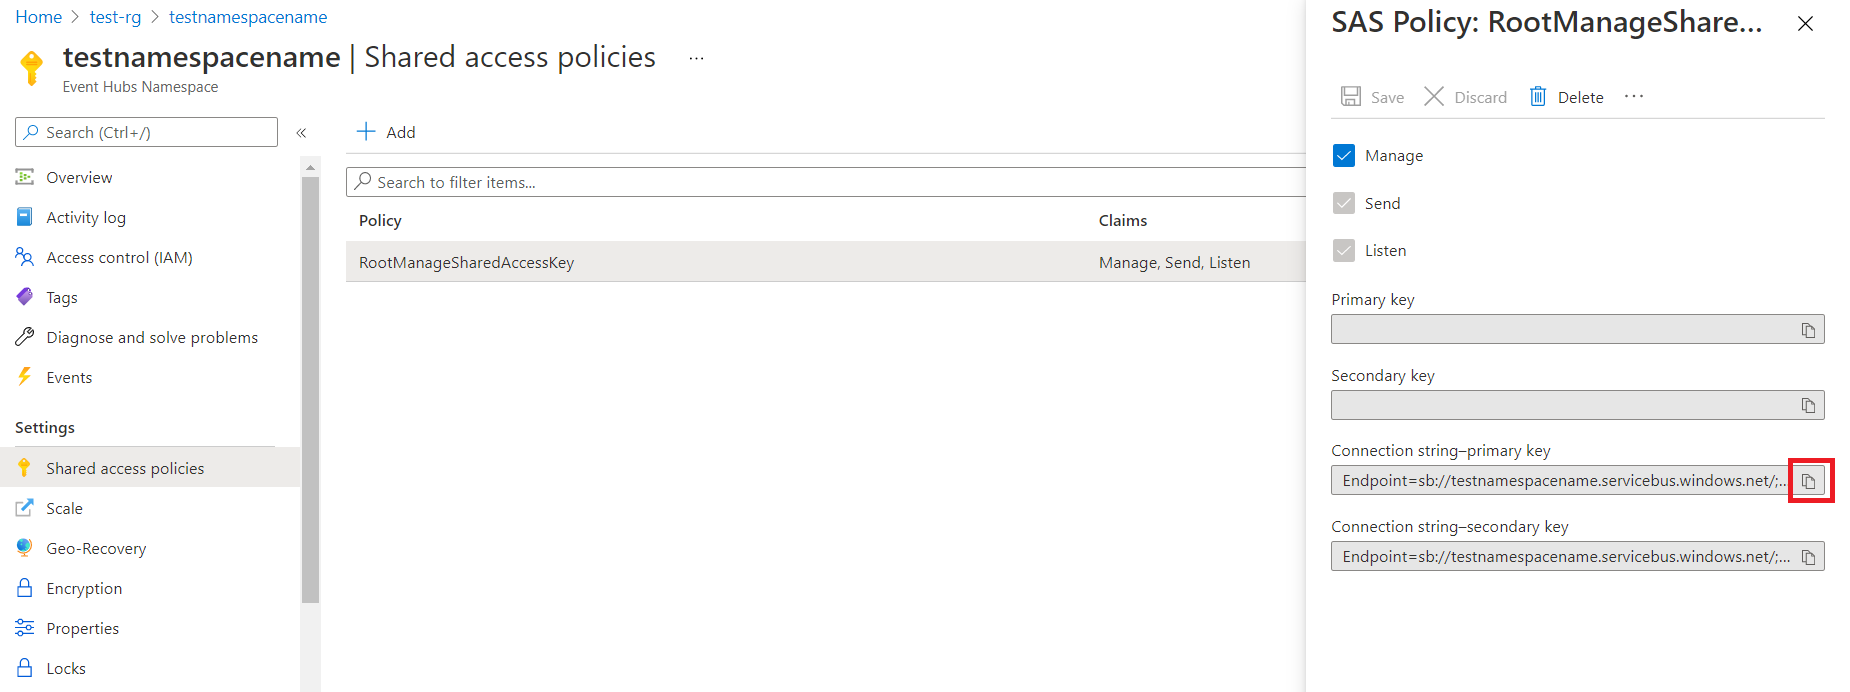
Then, click on the RootManageShareAccessKey policy:
Finally, click on the button to copy the corresponding connection string:
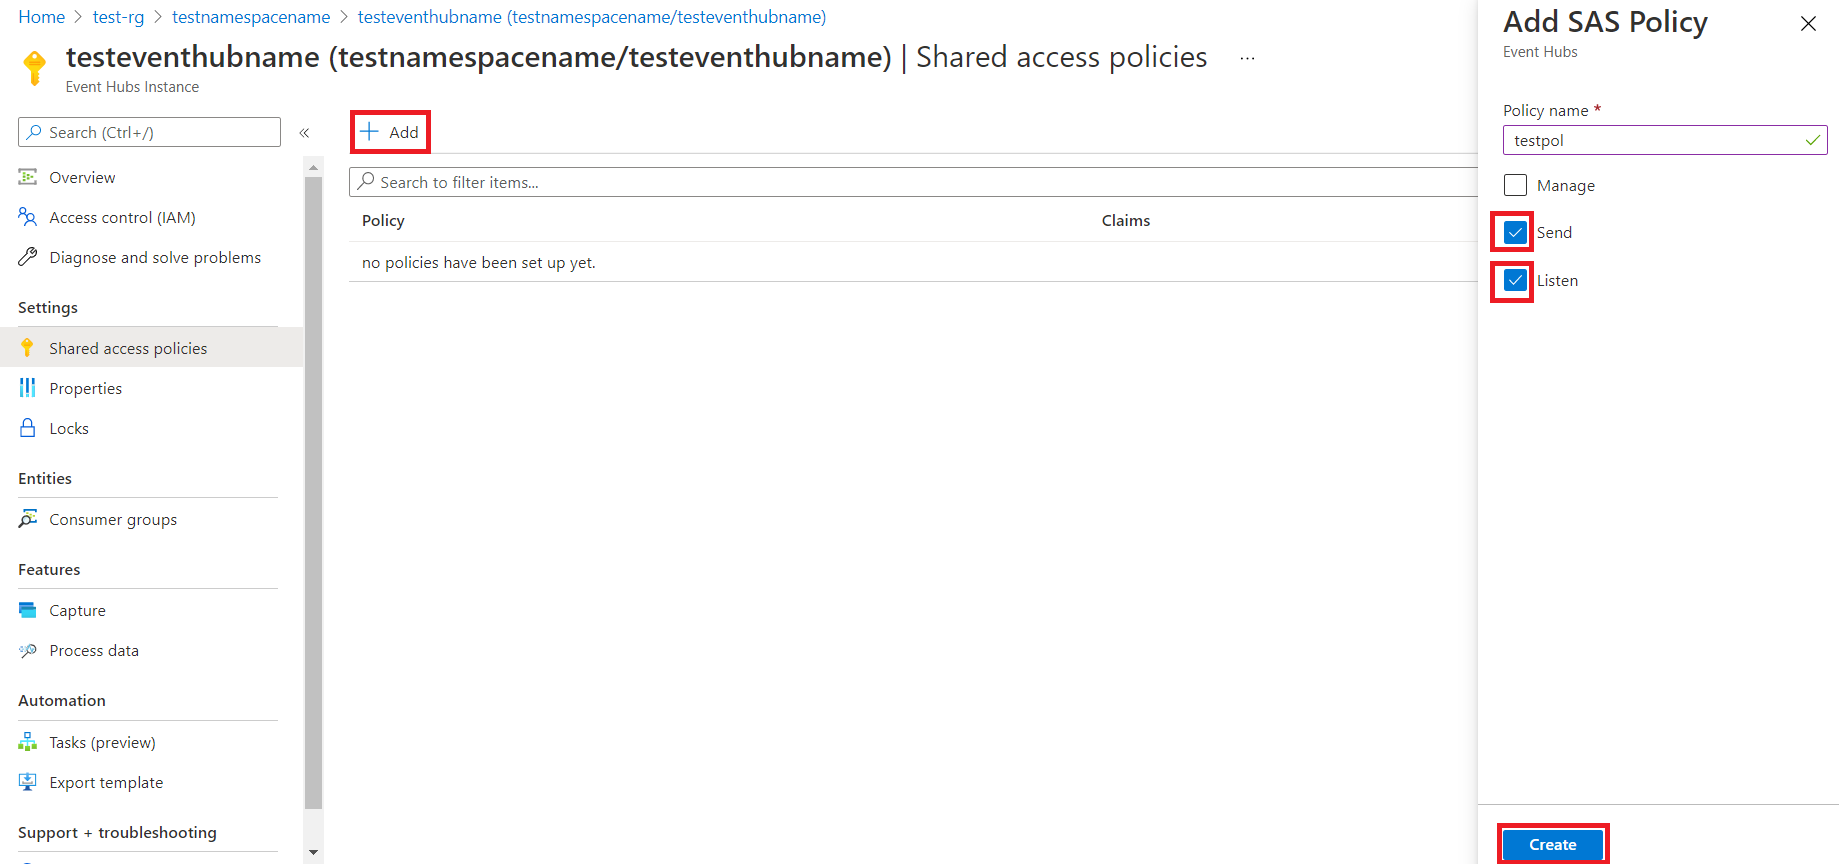
Alternatively, if you don’t want to use a Namespace policy, you can always create a custom policy for the Event Hubs instance.
- First, go to the Event Hub that you created and click on Shared access policies under Settings.
- Then, click the Add button. Give your access policy a name, and make sure it has permissions to both Send and Listen.
- Finally, click Create.
Creating an APIM Logger service
We will use Azure REST API to configure the API Management logger service. First, let’s go to the official reference page for how to Create Or Update a Logger:
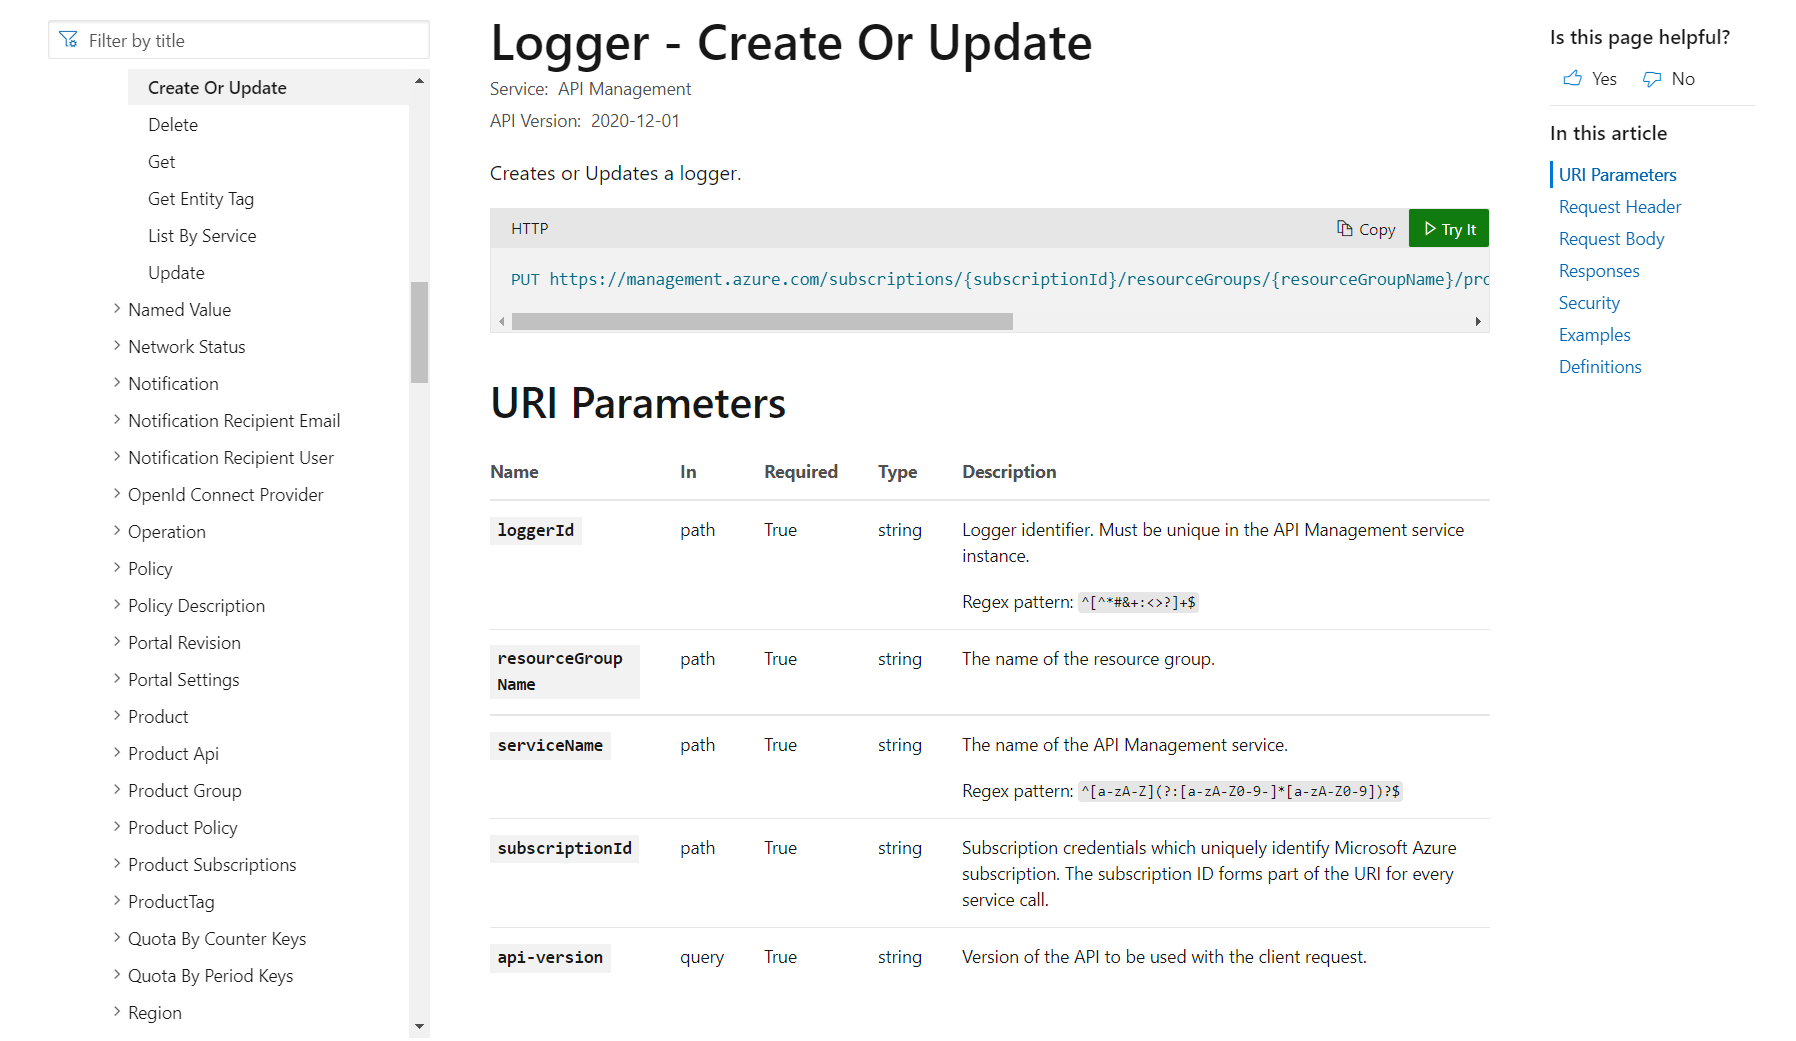
As you can see, we need to send a PUT request to a custom URI constructed using the following parameters:
loggerId: unique name you are giving to your logger.resourceGroupName: the resource group where your logger will live.serviceName: the name of your APIM instance.suscriptionId: the name of your Azure subscription.api-version: the Azure REST API version. Here we are using2020-12-01
The body of the request is a JSON object of the form:
{
"properties": {
"loggerType": "azureEventHub",
"description": "<< TYPE A DESCRIPTION HERE >>",
"credentials": {
"name": "<< PASTE HERE THE NAME OF THE EVENT HUB INSTANCE >>",
"connectionString": "<< PASTE HERE THE EVENT HUB CONNECTION STRING >>"
}
}
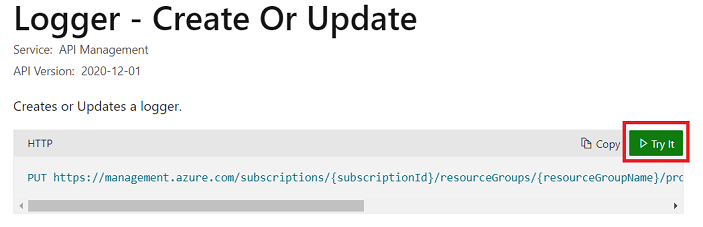
}This can be done using a tool like Insomnia. However, we will use the REST API Try It tool available by clicking the green Try It button at the top of the page:
After logging into your Azure account, a form will appear. By filling it out, the URI will be automatically constructed. In addition, paste in the request body JSON with your Event Hub information. In our example, the resource group is called test-rg and the APIM service is called testapiminst. So, we have:
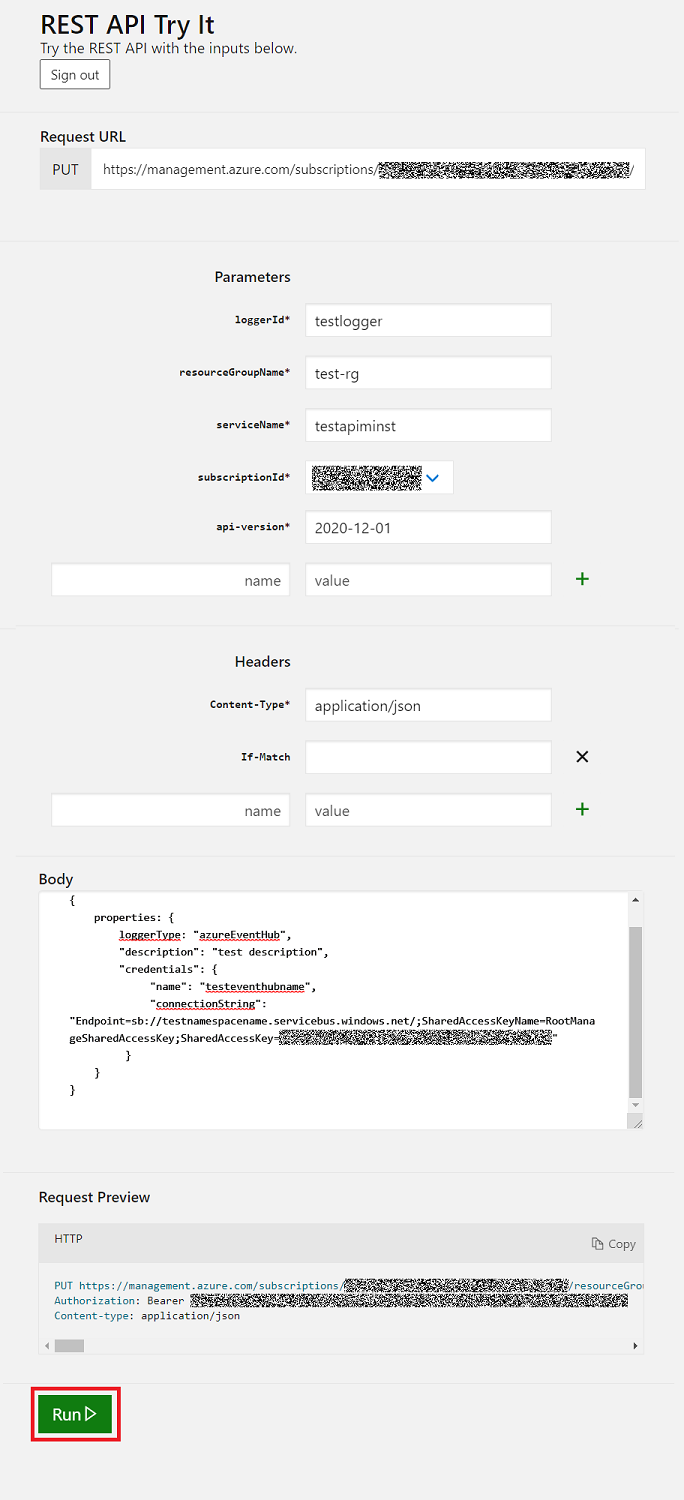
Click Run. You should see an HTTP response with 201 status code. Please, take note of the name given to the Logger (the logger ID).
Adding the Resurface log-to-eventhub policy to your APIM instance
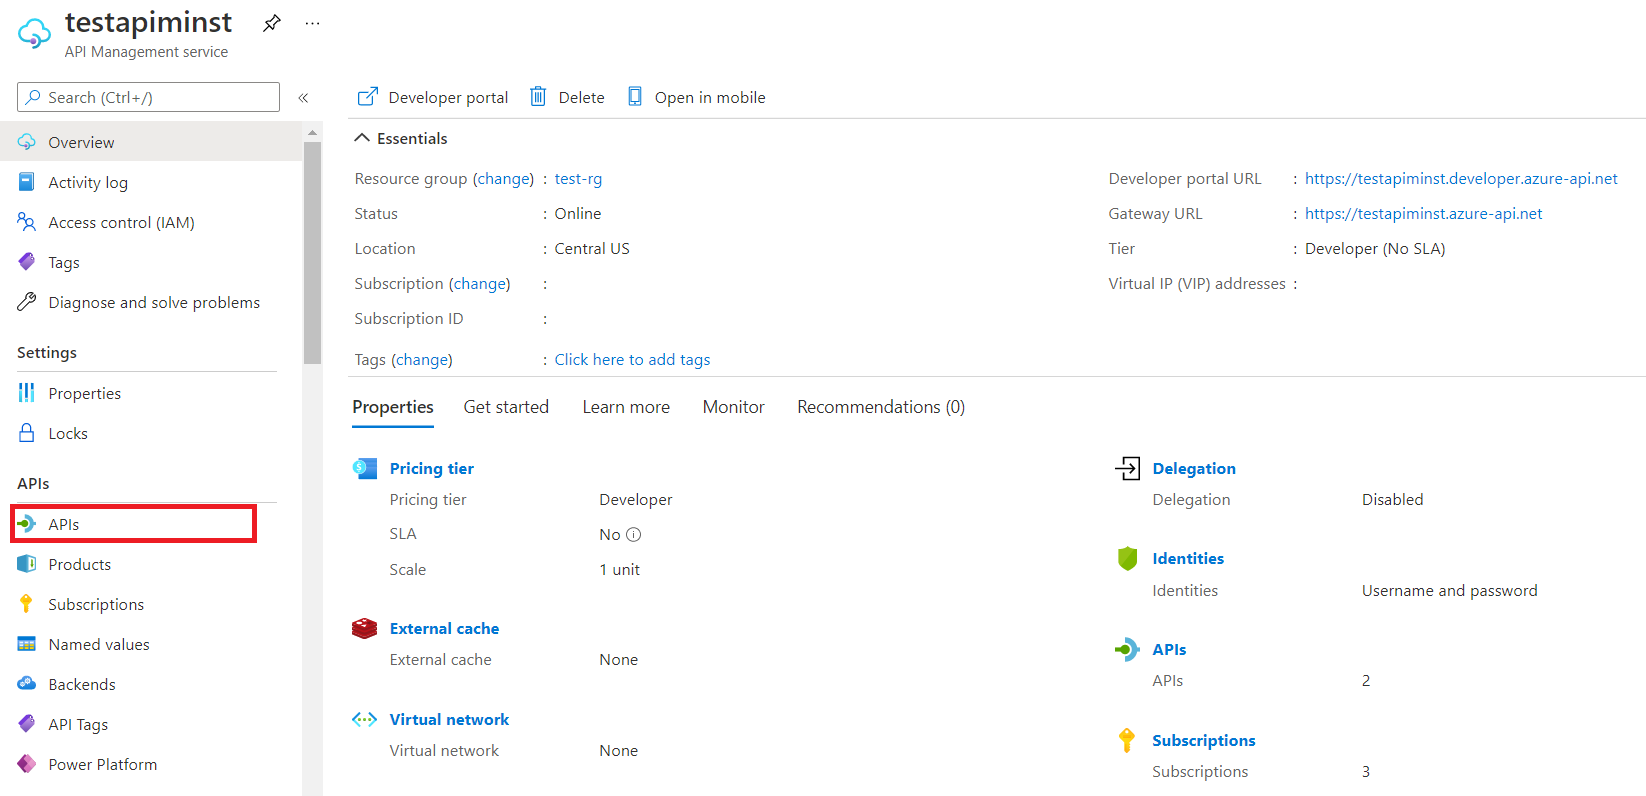
After having created our logger, we are ready to configure an API Management log-to-eventhub policy. First, go to your APIs by clicking on the APIs button under the APIs section inside your API Management resource:
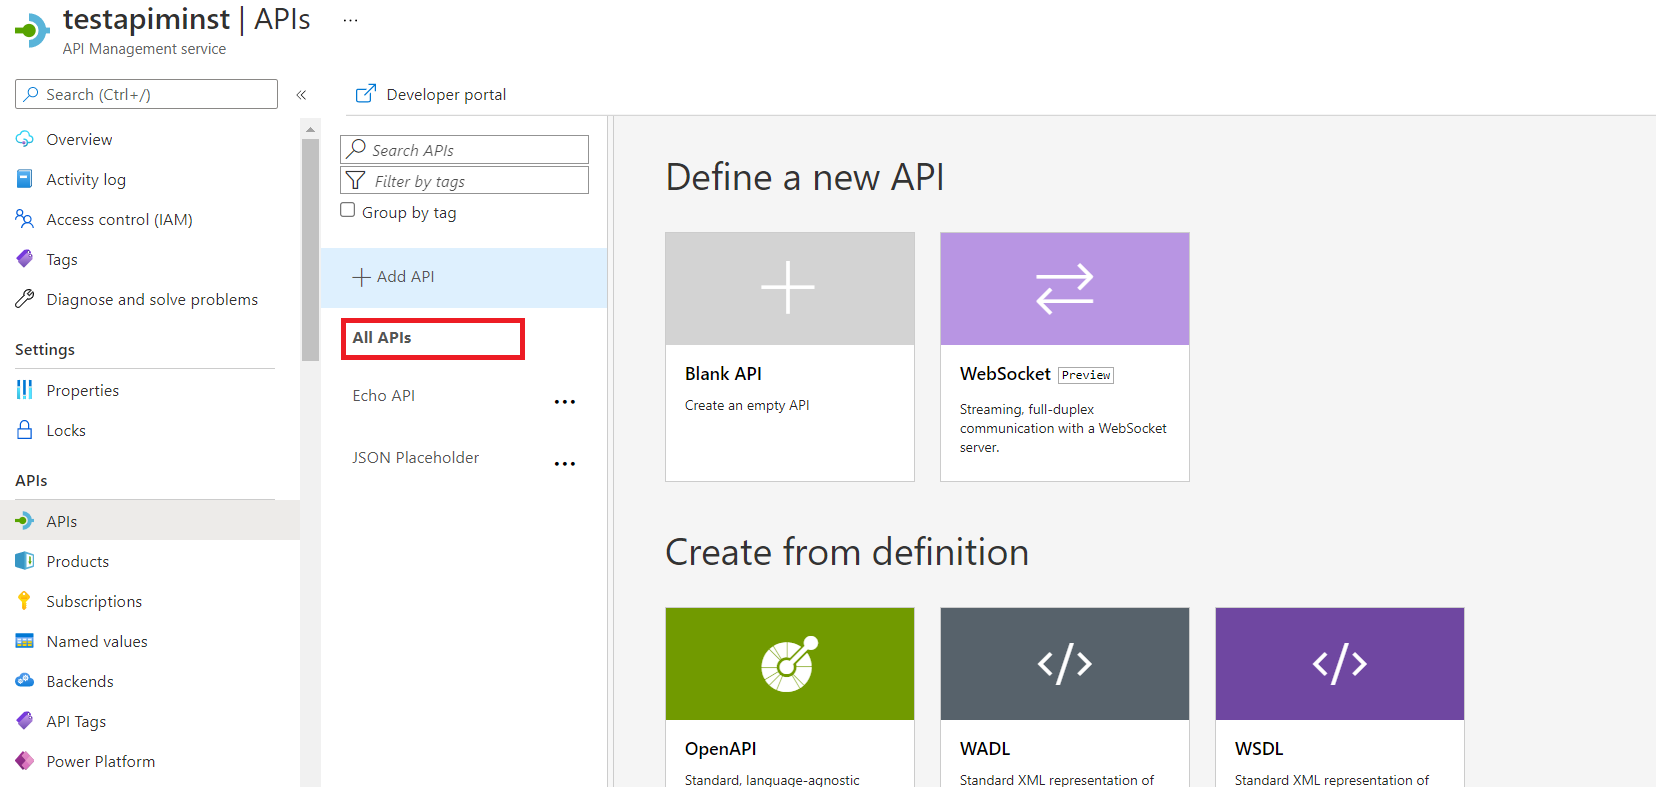
Then, click on All APIs:
Click on the policy code editor icon </>:
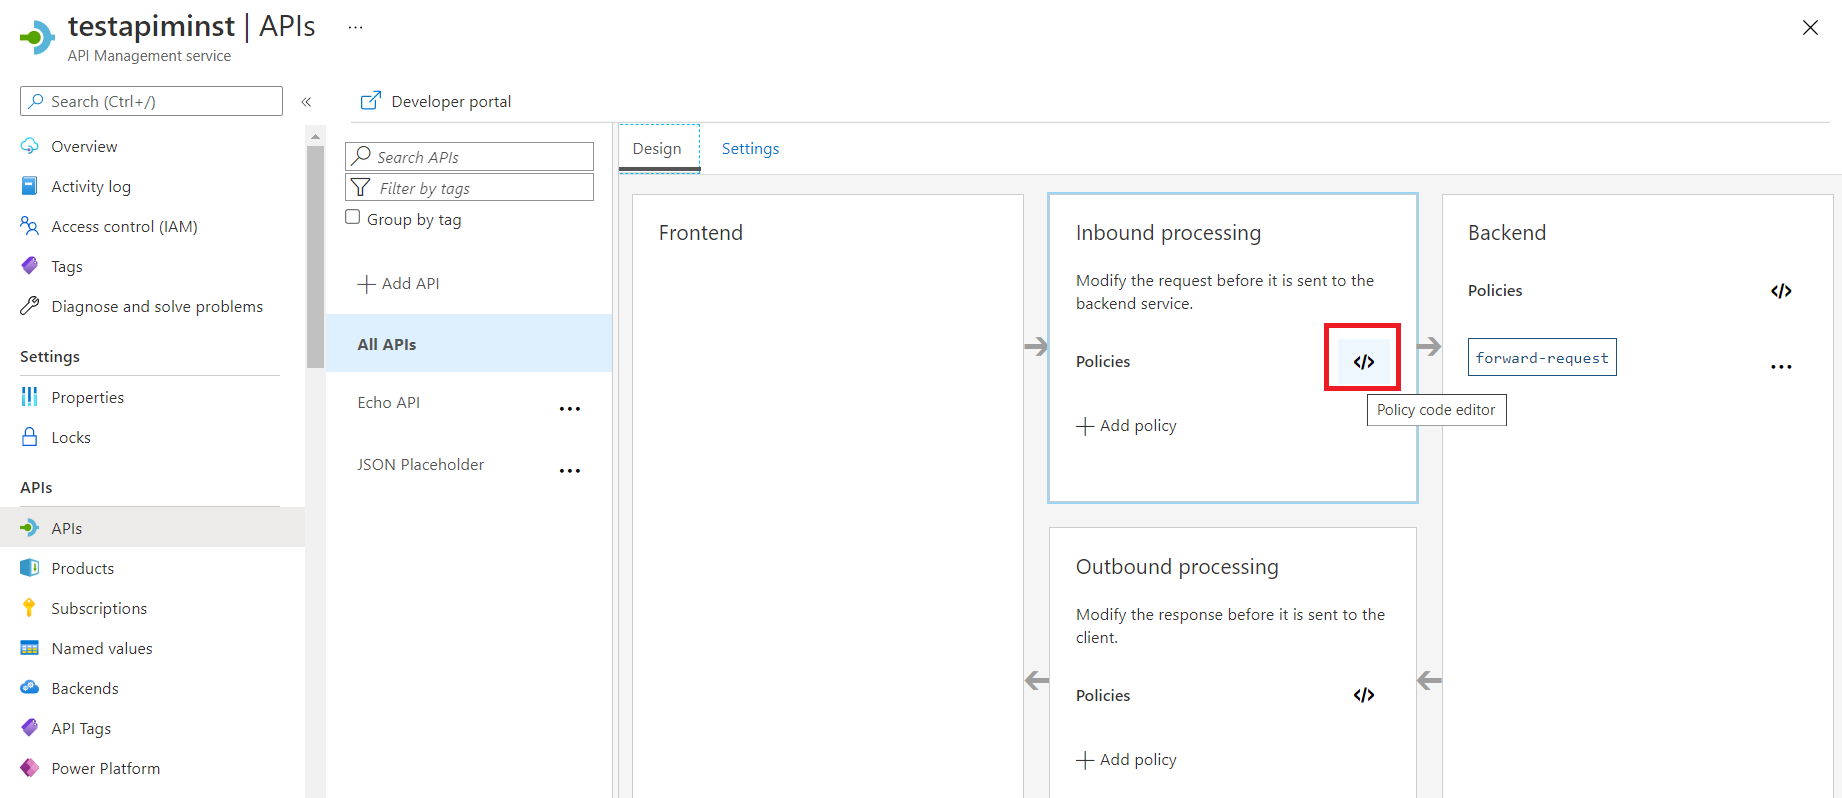
Replace all the xml code with the contents of our policy.xml file. Replace the logger-id attribute highlighted below with the name you gave to the APIM Logger service created on the previous section:
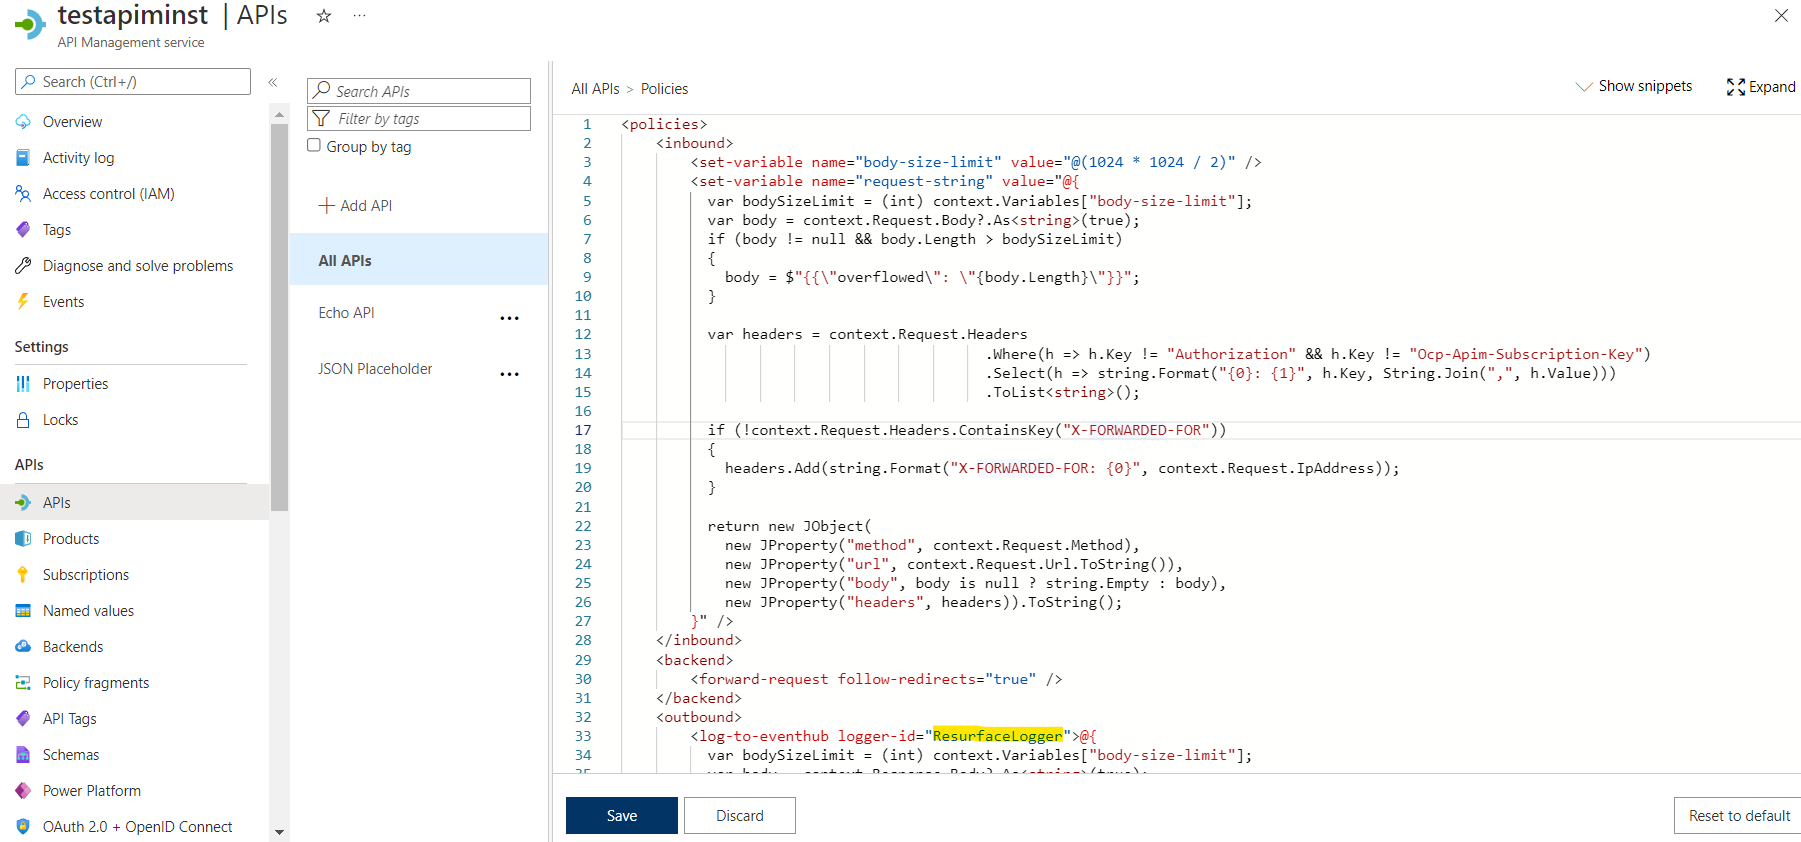
Click Save.
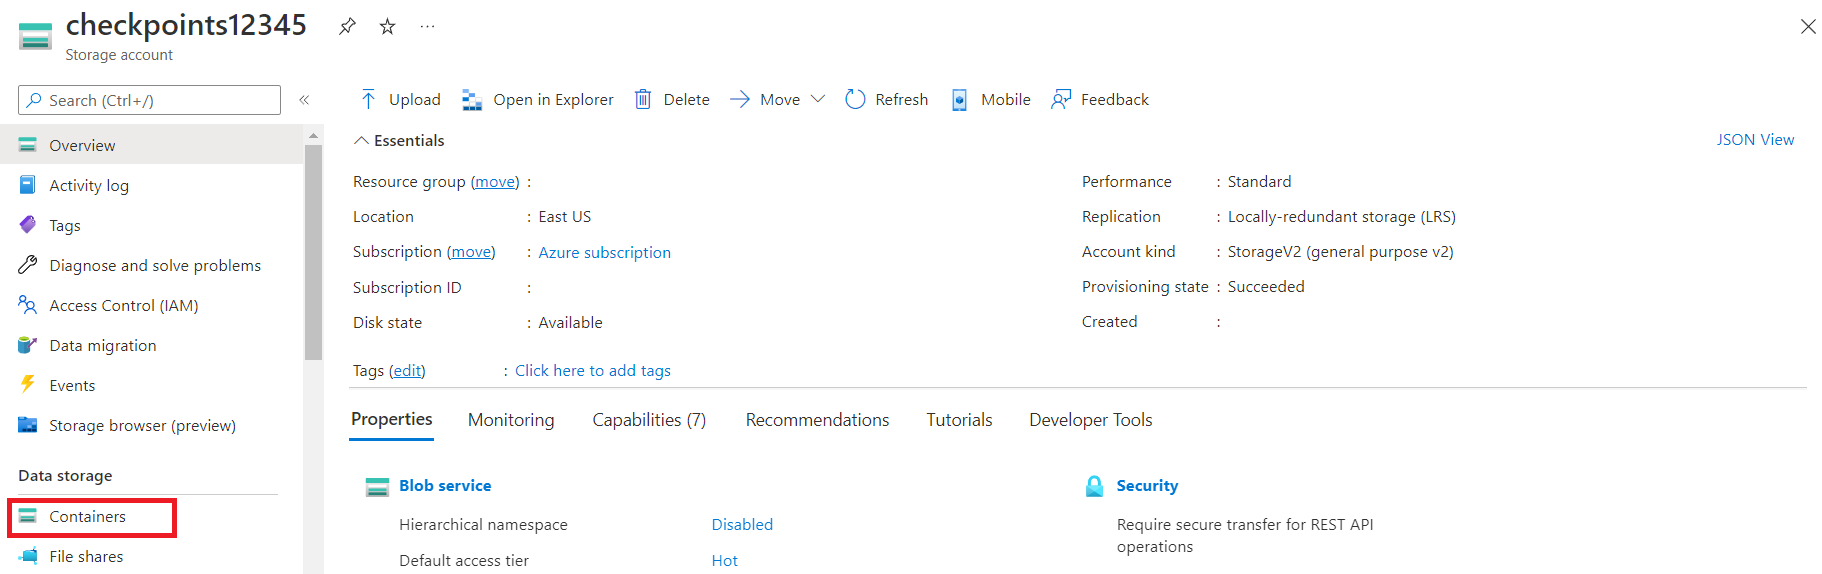
Creating a Storage account
At this point the API calls will be logged to our Event Hubs instance. In order to process and send them to your Resurface instance, we will use our azure-eh containerized application. It acts as an Event Hubs consumer that can be deployed with one or more replicas, with the ability to checkpoint its state to an Azure Storage account.
To deploy a Storage account, follow this guide from the official Microsoft documentation. Once you have successfully created your storage account, click the Containers button to create the Storage container required for checkpointing.
Add a new storage container and give it a name.
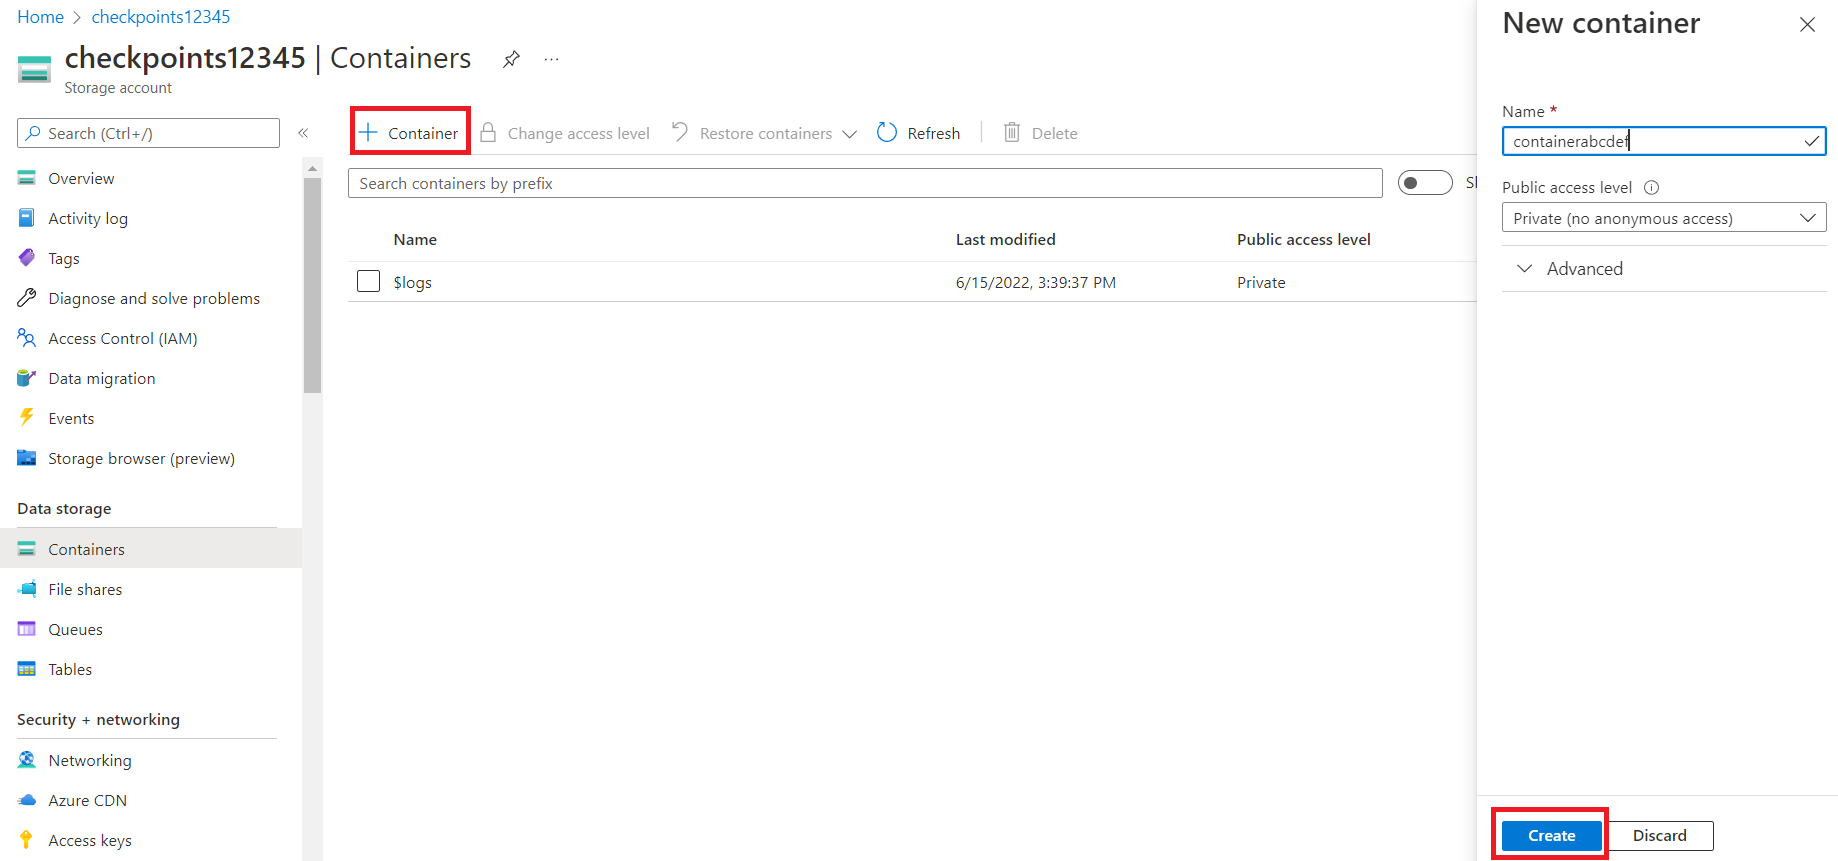
Click Create.
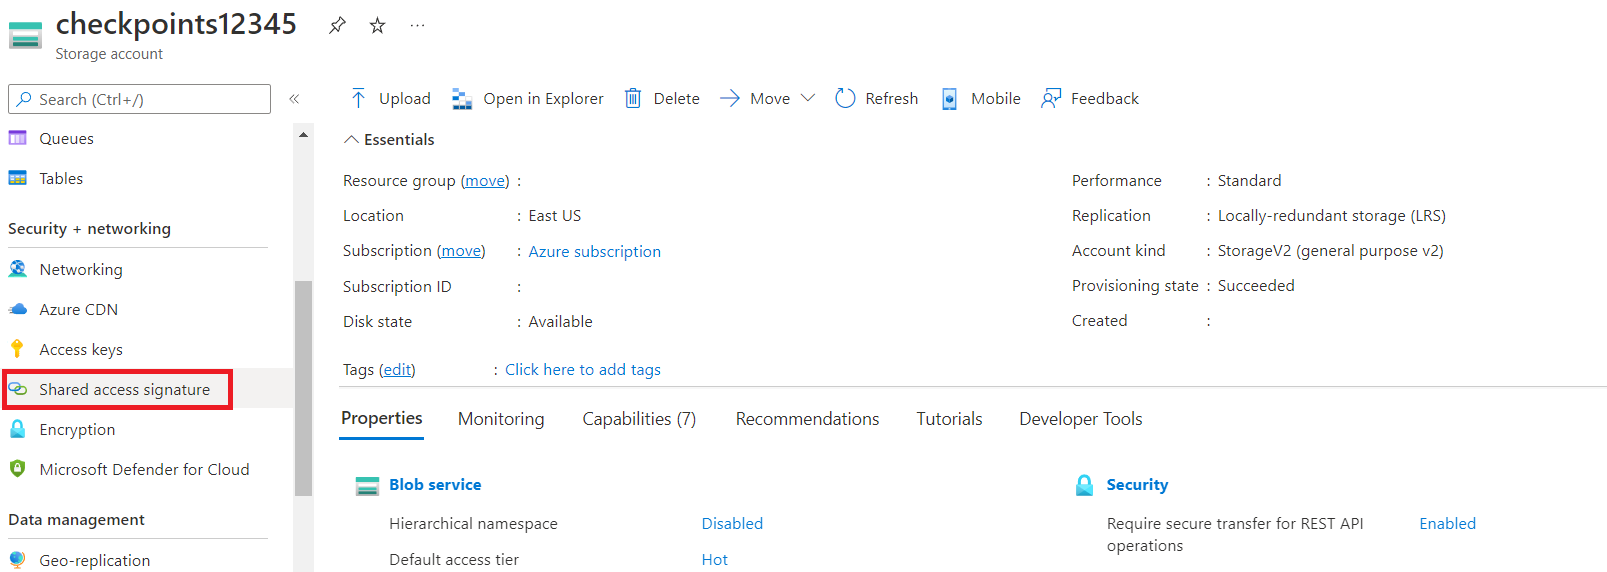
Getting the Connection String
You will also need to generate a connection string for this Storage account. Click Shared access signature
Mark Container as an allowed resource type.
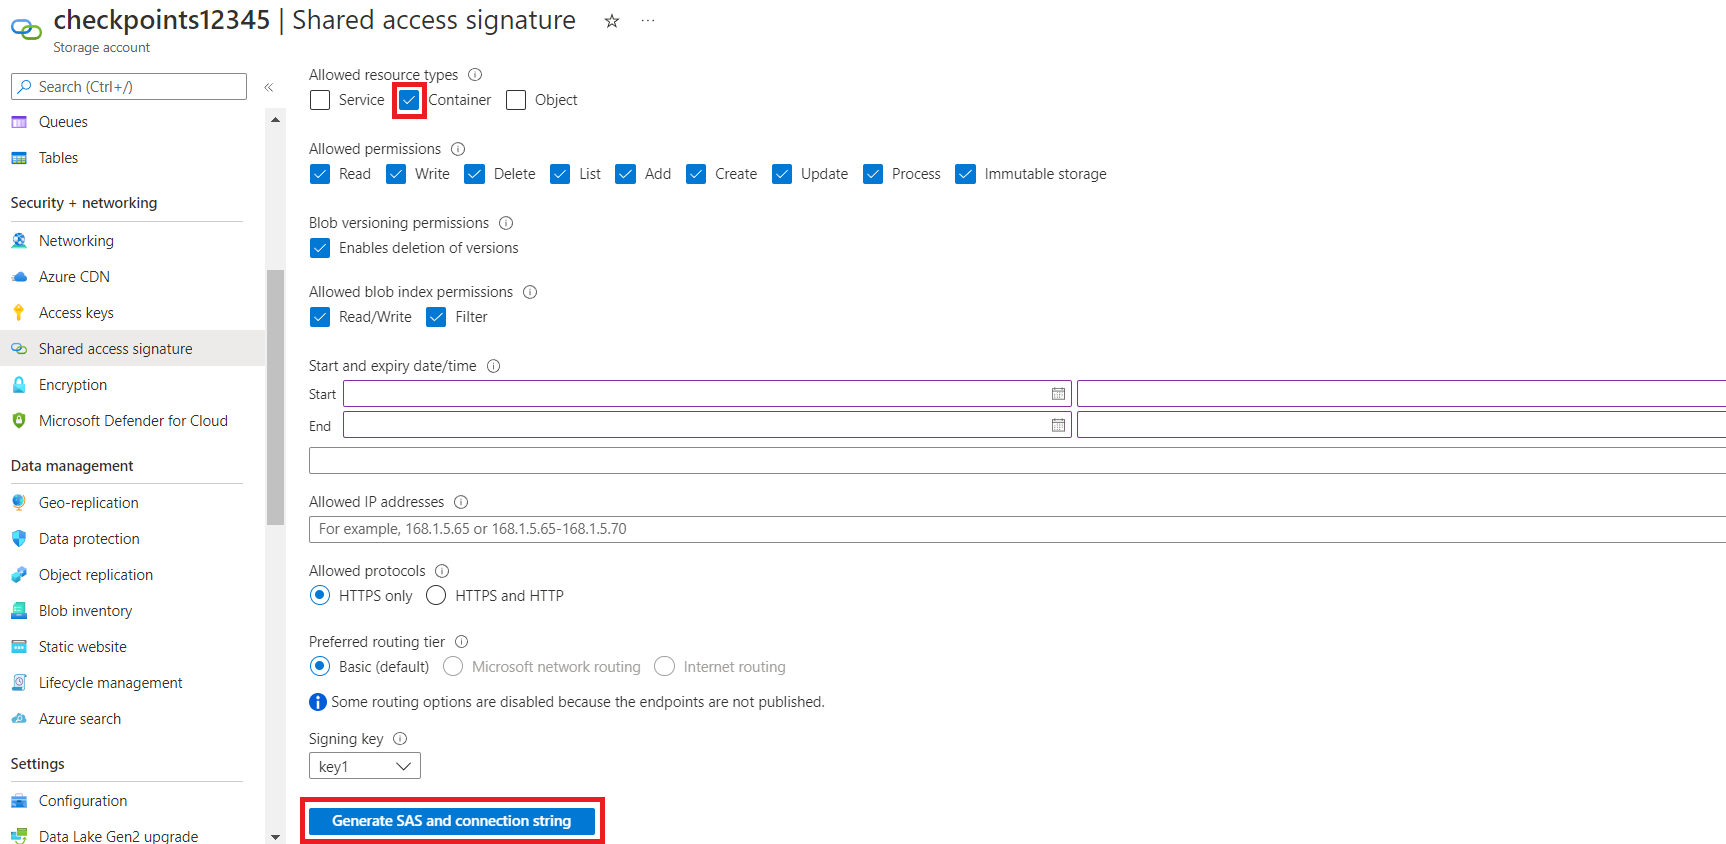
Click Generate SAS and connection string. Copy the connection string generated.
Running the containers
After having created the necessary resources, we can either run the Resurface Container Group on Azure or we can run it locally.
Cloud-based option
To deploy the Resurface Container Group to Azure, click the button below.
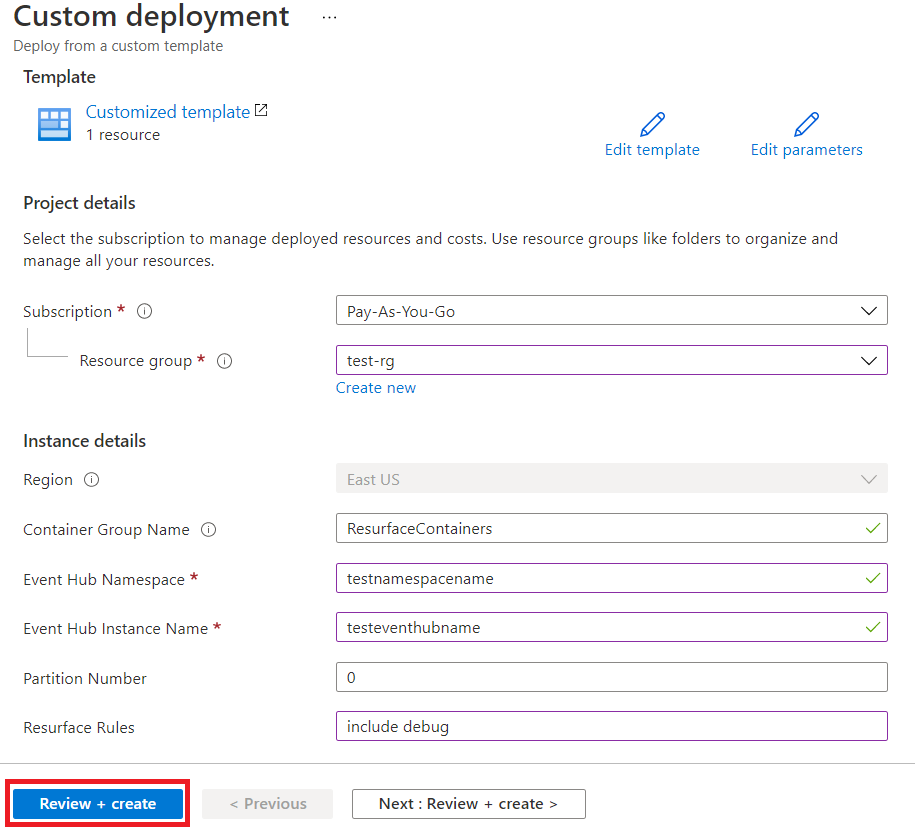
Fill in the deployment details with your information. Then, click on Review + create:
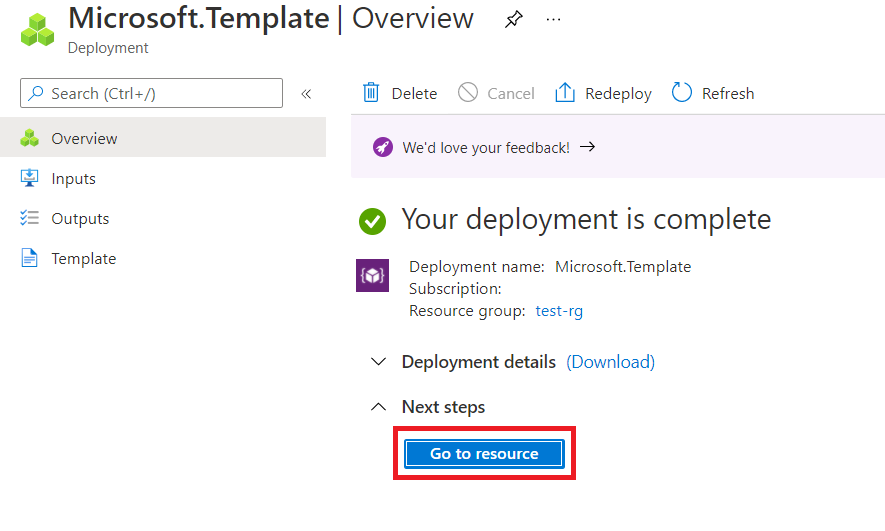
Once the deployment is complete, click Go to resource:
We can use the container’s Fully-Qualified Domain Name (FQDN) to access the Resurface API Explorer. Copy it from the Overview section of the ResurfaceContainers resource that we deployed on the previous step:
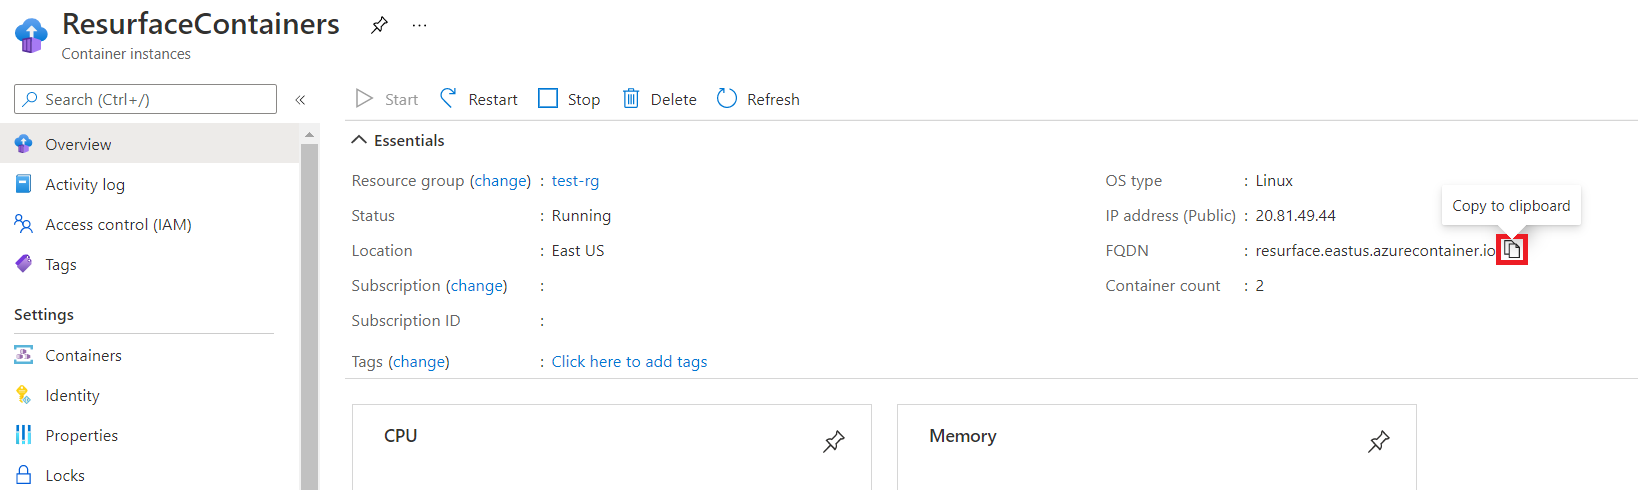
Now, paste it on your browser and append the port number to 7700. In our example, this results in: http://resurface.eastus.azurecontainer.io:7700/
Well done!
On-prem option
Requisites:
- docker
- docker-compose
First, login with the Resurface entitlement token:
docker login docker.resurface.io -u resurfacelabs/release -p TOKENAfter successfuly login in, clone our azure-eh GitHub repository and cd into it:
git clone https://github.com/resurfaceio/azure-eh.git
cd azure-eh
git checkout v3
Then, set following the environment variables in the .env file to their corresponding values:
| Variable | Set to |
|---|---|
AZURE_EH_CONNECTION_STRING |
Event Hubs Namespace connection string |
PARTITION_NUMBER |
Partition number configured in policy.xml. Should be "0" by default |
EVENT_HUB_NAME |
Name of your Event Hubs instance |
Finally, just
make startGo to http://localhost:7700 in your browser to access the Resurface API Explorer.
Enjoy!
🏁 Mission complete
You are now running your very own API system of record. Excellent!
